Identifying Blum Hinge Types and Mechanisms
/Adjust-Cabinet-Hinges-93246773-5751b7415f9b5892e8722a6b.jpg)
Blum hinges, renowned for their quality and durability, are a cornerstone of modern cabinet construction. Understanding their various types and mechanisms is crucial for both cabinetmakers and DIY enthusiasts alike. This section will equip you with the knowledge to confidently identify and work with these sophisticated components.
How to remove cabinet doors with blum hinges – Blum offers a wide array of hinge types, each designed for specific applications and door styles. These hinges are not simply simple pieces of metal; they are precision-engineered marvels of functionality and adjustability. Mastering their intricacies will elevate your cabinet work to a professional level.
Blum Hinge Types
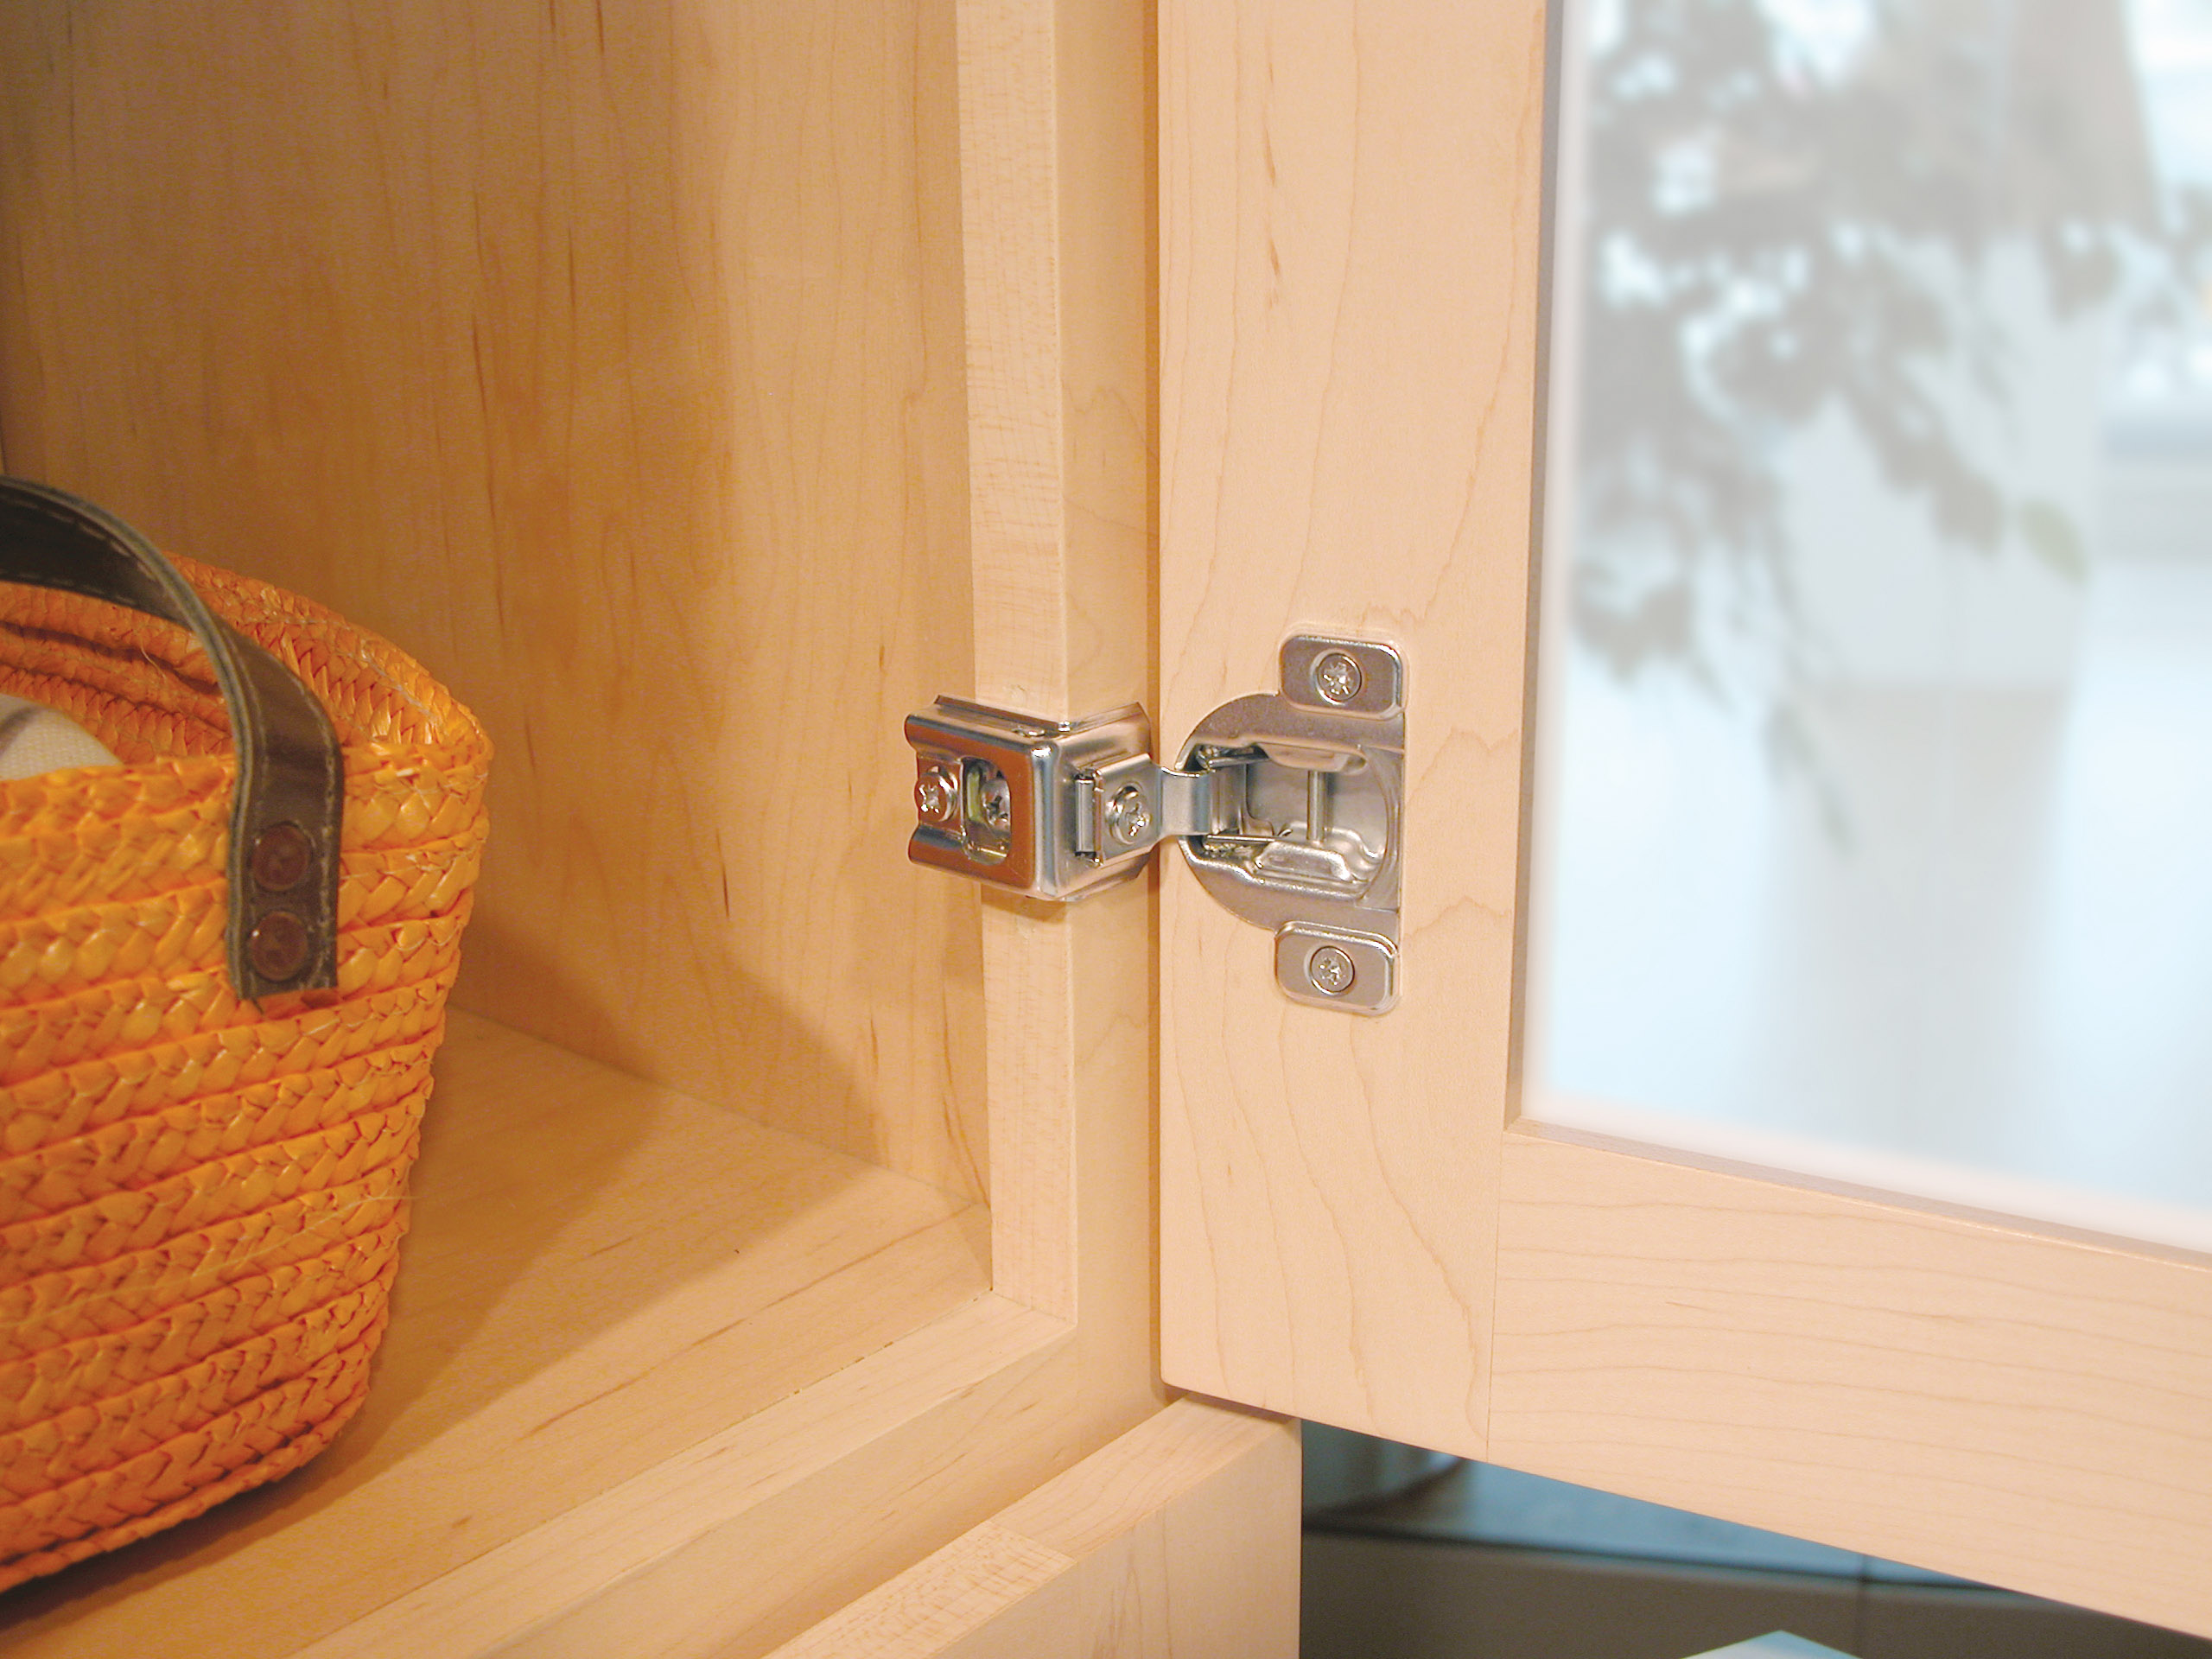
Blum produces several hinge families, each with its own characteristics. The most common include Clip-top hinges, inset hinges, and concealed hinges. Clip-top hinges, easily recognizable by their clip-on installation, are favored for their simplicity and ease of use. Inset hinges, on the other hand, are mounted directly into the cabinet door and frame, offering a clean, integrated look. Concealed hinges, as their name suggests, are hidden from view, contributing to a sleek and minimalist aesthetic. Within these families, there are numerous variations designed to accommodate different door thicknesses, weights, and opening angles.
Blum Hinge Components and Functions
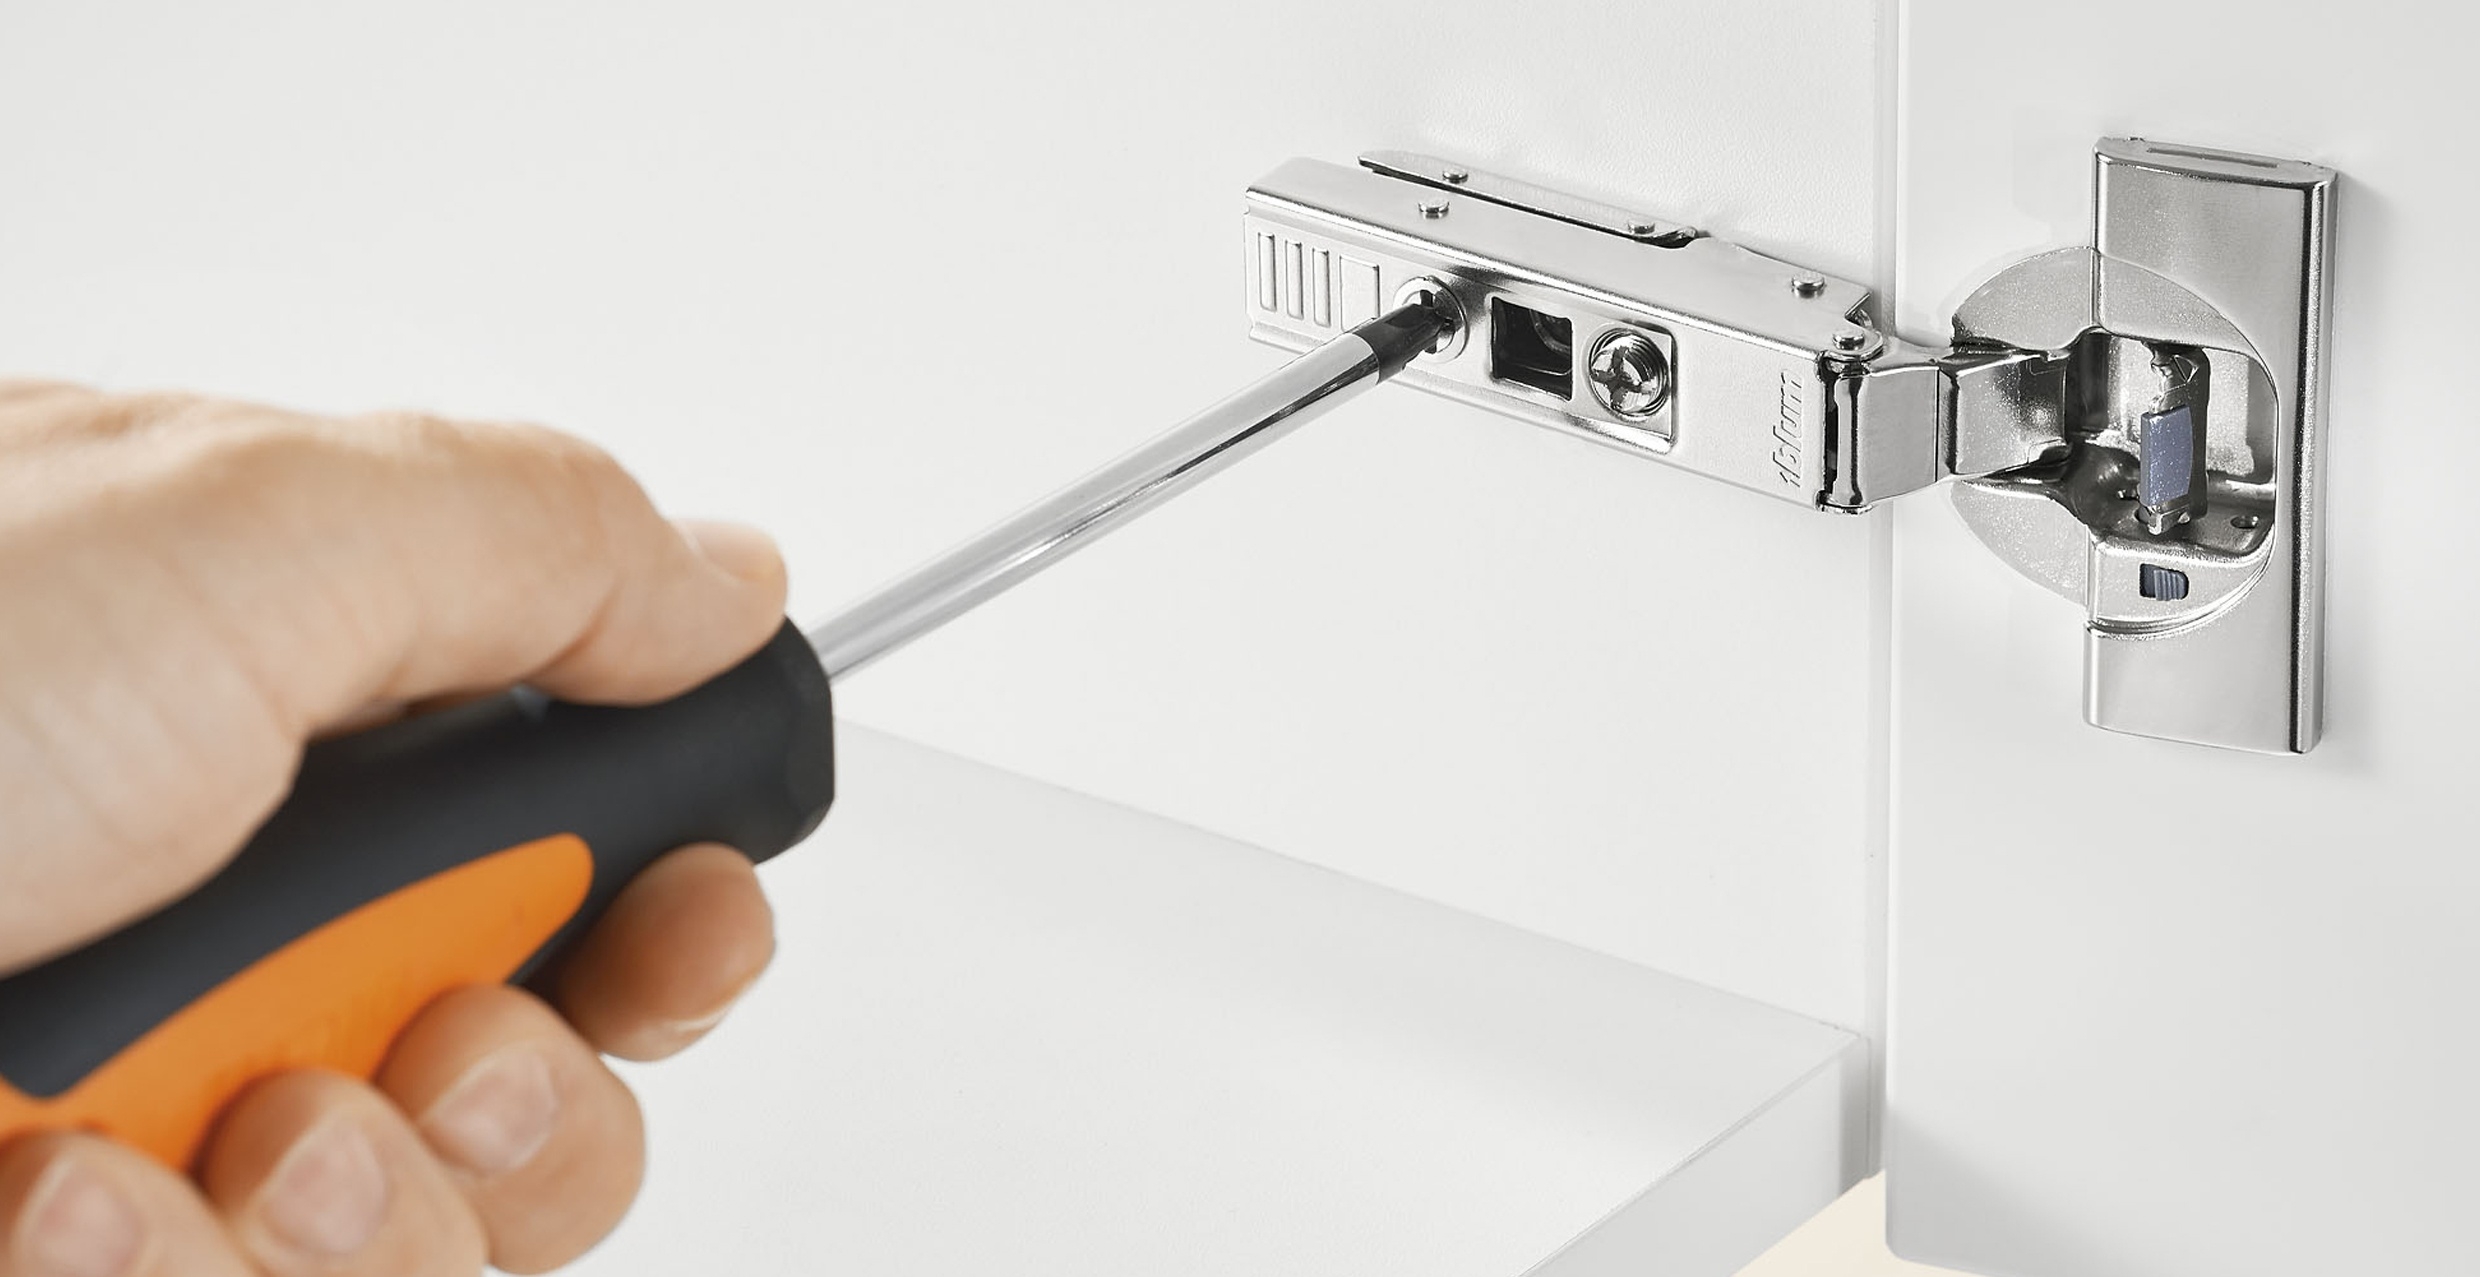
Each Blum hinge comprises several key components working in concert. The hinge cup, typically mounted on the cabinet door, receives the hinge arm. The hinge arm, itself a sophisticated piece of engineering, features adjustment screws for precise door alignment. These screws allow for three-dimensional adjustment – height, depth, and side-to-side. The mounting plate, attached to the cabinet frame, provides the stable base for the hinge’s operation. Some models also include a soft-close mechanism, ensuring a gentle and quiet closure. Understanding the function of each component is critical for proper installation and troubleshooting.
Blum Hinge Installation Methods
Blum hinges are renowned for their innovative and user-friendly installation methods. Many models utilize a simple clip-on system, eliminating the need for screws in the door itself. This streamlined process significantly reduces installation time and minimizes the risk of damage to the door. Other models require precise drilling and screwing, but Blum provides detailed instructions and jigs to ensure accuracy. The specific installation method varies depending on the hinge type and cabinet design, so always consult the manufacturer’s instructions for your specific model.
Comparison of Blum Hinge Models
| Hinge Model | Installation Method | Adjustment Capabilities | Removal Procedure |
|---|---|---|---|
| Blum Clip Top Blumotion | Clip-on | Height, side, depth | Press the release lever on the hinge cup and pull the hinge off. |
| Blum CLIP top 170° | Clip-on | Height, side, depth | Press the release lever on the hinge cup and pull the hinge off. |
| Blum Aventos HF | Screw-on | Height, side, depth | Remove screws securing the hinge to the cabinet door and frame. |
| Blum Tandem | Screw-on (for drawer systems) | Height, side, depth | Remove screws securing the hinge to the drawer and cabinet side. |
Step-by-Step Removal Process for Blum Hinges
Removing Blum hinges might seem daunting, but with the right approach and tools, it’s a manageable task. This step-by-step guide will empower you to tackle this project with confidence, ensuring a smooth and efficient process. Remember safety first – always wear appropriate safety glasses.
Identifying the Hinge Type and Mechanism
Before beginning, correctly identifying your Blum hinge type is crucial. Different Blum hinge models have slightly varying removal processes. Refer to the previous section on identifying Blum hinge types and mechanisms if you need a refresher. Understanding the hinge’s specific design will guide your approach and prevent unnecessary complications. Knowing whether you have a clip-on, screw-on, or a combination hinge will dictate the tools and techniques you employ.
Tools Required for Hinge Removal
Proper tools are essential for a clean and safe removal. The primary tool will be a small, flat-head screwdriver, ideally one with a thin, strong blade to avoid damaging the hinge. You might also need a hinge pin removal tool, which typically resembles a small, L-shaped metal tool designed to carefully lift the hinge pin. A second small screwdriver could be useful for accessing hidden screws. Lastly, having a small container to keep screws and pins organized prevents misplacement and simplifies reinstallation.
Step-by-Step Hinge Removal
- Locate the Hinge Pin: Carefully examine the hinge. The hinge pin is usually a small, cylindrical metal rod that runs horizontally through the hinge cup. It might be partially or fully visible depending on the hinge design. A visual inspection will often be sufficient.
- Access the Hinge Pin: Depending on the hinge design, the pin may be readily accessible, or it might be slightly recessed. For recessed pins, use a small, flat-head screwdriver to gently pry open any retaining clips or mechanisms that are obstructing access to the pin. Avoid using excessive force.
- Remove the Hinge Pin: Using your hinge pin removal tool (or a small, thin flat-head screwdriver if necessary), carefully push the pin out from one side of the hinge. Work slowly and deliberately to avoid bending or damaging the pin. Imagine the image: a thin, flat-head screwdriver gently pressing against the edge of the hinge pin, carefully nudging it out. The pin should slide out relatively easily once you’ve gained access.
- Separate the Hinge from the Door: Once the pin is removed, the hinge should separate from the door. Gently pull the door away from the cabinet to release the hinge. If any screws are present, unscrew them carefully before separating the hinge and door.
- Remove any Remaining Screws or Clips: After separating the hinge, check for any remaining screws or clips securing the hinge to the cabinet. These might be located on the hinge plate itself. Use the appropriate screwdriver to remove them. Visualize this: the screwdriver’s head precisely fitting into the screw’s slot, allowing for a controlled and smooth removal.
- Repeat for Remaining Hinges: Repeat steps 1-5 for each hinge on the cabinet door. Keep all screws and pins organized in your container to aid reassembly.
Flowchart for Hinge Removal, How to remove cabinet doors with blum hinges
Imagine a flowchart with the following steps:
1. Start: Identify Hinge Type.
2. Gather Tools: Flathead screwdriver, hinge pin removal tool.
3. Locate Hinge Pin: Inspect the hinge for pin location.
4. Access Hinge Pin: Use screwdriver to release clips if necessary.
5. Remove Hinge Pin: Gently push pin out.
6. Separate Hinge: Pull door away from cabinet.
7. Remove Screws/Clips: If present, unscrew and remove.
8. Repeat: For all hinges.
9. End: Hinges removed.
Cautions and Considerations
Always prioritize safety. Avoid excessive force to prevent damage to the hinge, door, or cabinet. Work slowly and deliberately, and use the appropriate tools. If you encounter resistance, re-evaluate your approach before applying more force. If you’re unsure about any step, consult the manufacturer’s instructions or seek professional assistance.
Troubleshooting Common Issues and Alternative Methods: How To Remove Cabinet Doors With Blum Hinges
Removing Blum hinges, while generally straightforward, can present unexpected challenges. Understanding potential problems and alternative approaches is crucial for a smooth and damage-free process. This section will equip you with the knowledge to overcome common obstacles and ensure a successful cabinet door removal.
Successfully removing Blum hinges hinges often depends on understanding the specific hinge type and its mechanism. A slight variation in technique can prevent frustration and potential damage. Let’s examine some common difficulties and their solutions.
Difficult-to-Reach Screws
Sometimes, screws securing the hinge to the cabinet or door are difficult to access due to tight spaces or obstructions. This often requires the use of specialized tools. A magnetic screw retrieval tool can be invaluable for retrieving dropped screws. For particularly stubborn screws, a right-angle screwdriver or a flexible shaft screwdriver might be necessary. In cases where even these tools fail, carefully using small pliers to grip and turn the screw head may be required. Remember to always prioritize careful manipulation to avoid damaging the surrounding wood.
Hinge Resistance
Occasionally, hinges might exhibit unexpected resistance during removal. This could stem from paint build-up, dried adhesive, or even slight warping of the wood. Applying a small amount of penetrating oil to the hinge mechanism can help loosen things up. Gently tapping the hinge with a rubber mallet can sometimes free up stubborn parts. However, excessive force should always be avoided to prevent damage. If the hinge continues to resist, carefully examine the hinge itself for any obstructions or binding points.
Preventing Damage to the Cabinet or Door
Protecting the cabinet and door during hinge removal is paramount. Using soft cloths or masking tape to protect the surrounding wood can prevent scratches and dents. Applying even pressure when removing screws helps avoid stripping the screw heads. A well-lit workspace allows for better visibility and precision, reducing the chances of accidental damage. If working with older cabinets, be especially mindful of the wood’s fragility and potential for cracking.
Alternative Removal Methods
While the standard method involves removing screws, certain Blum hinge types might require slightly different approaches. Some hinges may have a release mechanism that allows for removal without completely unscrewing all components. Carefully examine the hinge mechanism for any release levers or buttons. Consulting the Blum hinge’s specific instructions is highly recommended. For very old or stubborn hinges, using a specialized hinge removal tool designed for Blum hinges can provide leverage and reduce the risk of damage. These tools typically offer a gripping mechanism to hold the hinge firmly while unscrewing it.

